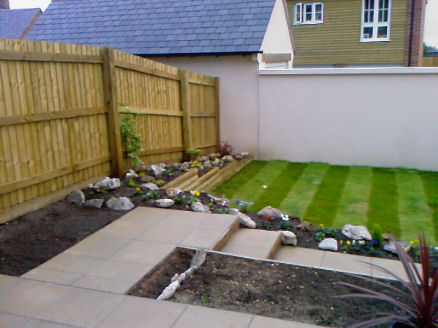
The Patio AreaBefore I embarked on the building of a deck and the lower patio I had previously had the bottom half of the garden lowered, levelled off and turfed. Apart from the upper patio and steps, the rest of the garden was sloped and unusable.
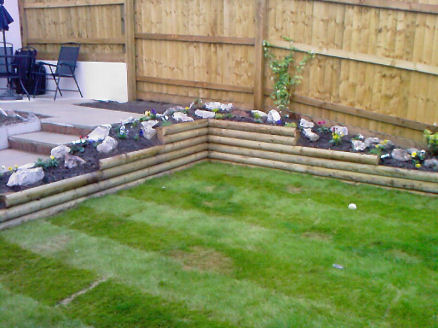
So, the first thing to do was to level off the bottom half of the garden. The problem here was that the fence posts were at the higher side of the garden and I didn't want to undermine the stability of the posts so I decided that a border of about 2 and a half feet (750mm) would have to remain.
A wooden retaining wall was built around the steps and the fence, the soil was then levelled off by removing the soil from the high side and using it to infill the low side, the excess soil was then taken off site and disposed of. I had the lower part of the garden laid to lawn at first as it was cheap to do and it gave me time to decide what to do with the rest of the garden. The lawn was eventually replaced with slabs.
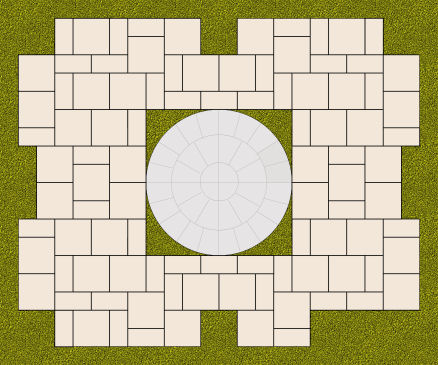
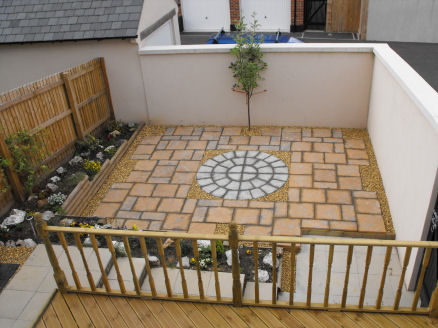
I found a reasonably priced patio kit at a local garden centre, the pack only included the full and half riven slabs and covered a 7 square metre area. All in all I had to cover about 18 square metres so I needed two of these, the circle for the middle and some stones to finish of the edges. I had no idea how I was going to arrange the slabs so I used a computer aided design program to play around with the different options available. A bit like a jigsaw!
Anyway, before I could lay the slabs the area had to be prepared. All of the turf was removed and the area was levelled off using wooden stakes and a spirit level. Attention to detail at this stage to make sure that the ground is flat and level saves a lot of time later, and makes laying the slabs much easier. Nearly two tons of gravel (or scalpings) were raked over the area and I used a whacker plate to compact the gravel to form a solid base.
Starting at the top right hand corner, a bed of concrete was spread and the slabs tapped down ensuring that they were each level with a slight slope to allow the rain to run off. Some people use a "dot and dab" system to lay patio slabs but in practice a solid concrete base is much, much better. If you use a contractor to lay the slabs make sure that they use a solid concrete base. Where stones were used to fill in the gaps around the circle and edges, I made sure that there was no concrete. The reason for this is to allow water to drain into the soil. There are also environmental reasons for doing this as well as to provide access to the sub soil for plants.
|
|
|
|
Copyright © 2010, All rights reserved. |